Spring Container Planting: Creating Vibrant Seasonal Displays
Spring is a time of renewal and anticipation in the garden. After the long winter months, both gardeners and their outdoor spaces crave color and vitality. Container planting offers an excellent opportunity to introduce immediate seasonal interest, even before the garden’s permanent plantings have fully awakened. With thoughtful selection and arrangement, spring containers can transform patios, balconies, and entranceways into vibrant focal points that celebrate the changing season.
The Strategic Advantage of Container Gardening
Container gardening provides unique benefits that complement traditional garden beds. Containers allow gardeners to introduce seasonal color precisely where it’s needed most – near seating areas, entrances, or viewpoints from inside the home. They also offer versatility for those with limited space or challenging growing conditions.
“If you’re anything like me, I expect you’re craving to see some color in the garden at the moment,” notes Arrit, a container gardening specialist. “I know the bulbs are on their way, but I’m impatient, I want to see something now. The answer has to be a container.”
For spring displays, containers provide an opportunity to showcase early-flowering plants while the rest of the garden gradually emerges from dormancy. They can be positioned to maximize visual impact and moved as needed to optimize growing conditions or visual appeal.

Scan smarter. Create faster. Free.
Download QR & Barcode Studio — Create and scan unlimited QR codes & barcodes.
No paywalls. No limits. 100% Free.
Selecting the Ideal Container
The container itself plays a crucial role in the overall design. When selecting a vessel for spring planting, consider both aesthetic and practical factors:
Material Considerations
Zinc containers, like the one Arrit selects for her demonstration, offer several advantages:
- Lightweight construction: “Because it’s zinc, it’s very light, which is what I want, because I’m going to be filling it full of compost and crocks,” Arrit explains.
- Neutral coloration: “The color of zinc is something that I really enjoy because it’s pale, it’s neutral, so the plant colors will really zing when they’re all in there.”
- Modern aesthetic: The clean lines and contemporary finish complement various garden styles.
Other container materials each offer distinct benefits:
- Terracotta provides a traditional look and natural porosity
- Concrete offers durability and thermal mass
- Composite materials combine lightweight properties with weather resistance
Size and Shape
For spring displays, width often matters more than depth. “I’ve chosen this container because it’s really nice and wide, which means I can get a lot of plants into it,” Arrit notes. A wider container allows for more complex plant combinations and creates a more substantial visual impact.
Consider the mature size of your chosen plants when selecting container dimensions. Allow sufficient space for growth while maintaining an attractive composition from the moment of planting.
Drainage Requirements
Proper drainage is essential for container success. “Just make sure to add some drainage holes,” Arrit advises. For containers without pre-drilled holes, use a drill with an appropriate bit to create several openings in the base.
Line the bottom of the container with broken pottery pieces (crocks) to prevent soil from washing out while maintaining drainage. This layer should be approximately 1-2 inches deep, depending on the container size.
Soil Selection and Preparation
The growing medium in a container provides both nutrition and structural support for plants. For spring containers:
- Use a high-quality, peat-free compost or potting mix specifically formulated for containers
- Fill the container approximately halfway before beginning to position plants
- Leave adequate space for the root balls of your selected plants
“I’ve added crocks and peat-free compost, but only about halfway up. Leave space for the plants,” Arrit demonstrates. This approach allows you to position plants at appropriate depths and ensure proper soil coverage around the roots.
Design Principles for Spring Containers
Creating an effective container display requires consideration of both aesthetic and cultural factors. Approach your container as a miniature garden with distinct zones:
“The way to approach a container is to think of it as a mini border,” Arrit explains, “so have something that’s got some height to anchor it. Around the middle, there’s going to be some bulkier plants, and then smaller plants that can act as the understory to frame the edge.”
Light and Exposure Considerations
Position your container where it will receive appropriate light for the plants you’ve selected. For spring containers featuring early-flowering plants:
“This container will be in a position where there’s a bit of sun this time of year, and I want some soft colors to match the pale, late winter light,” Arrit notes.
Understanding the light patterns in your garden helps ensure plant success. Many spring-flowering plants appreciate bright light but may require protection from intense afternoon sun.
Color Harmonies and Contrasts
When selecting plants for your container, consider how colors will interact:
- Complementary colors: Contrasting colors that enhance each other’s vibrancy
- Analogous colors: Similar colors that create a cohesive, harmonious effect
- Monochromatic schemes: Variations of a single color for sophisticated impact
“There are some beautiful options to choose from to make the most of the season,” Arrit observes. The soft, nuanced colors of early spring can be particularly effective when thoughtfully combined.
Plant Selection for Structural Impact
Successful containers feature plants that fulfill different roles within the composition. For maximum impact, include:
Height Elements
Taller plants create vertical interest and serve as anchors for the composition:
“I’m going to start with the height. So these two, this Mahonia really love that zing of yellow and it’s very fragrant. Great plant, got architectural value with its leaves, it’s evergreen, so that’s going to really anchor the space.”
“In contrast, I have this tree heather, Erica Australis Polar Express, and it’s got a tiny delicate creamy flower, really small leaves, so when you put them together, the contrast sits very well.”
These height elements should be positioned toward the back of containers viewed from one side, or centrally for containers viewed from all angles.
Mid-Layer Plants
The middle layer provides substance and transitions between taller and shorter elements:
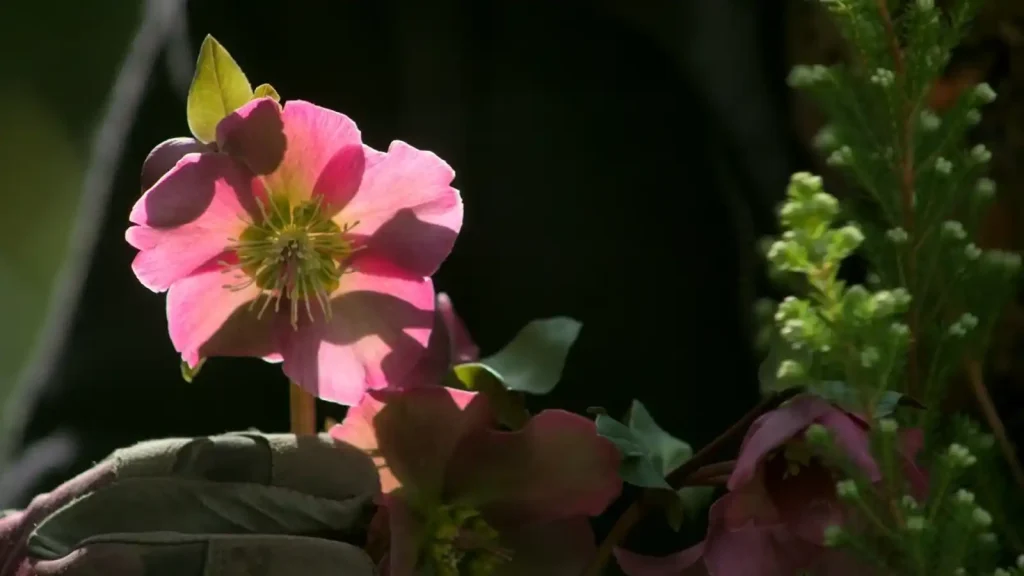
“Next layer is this mid layer here… This hellebore ‘Annas Red’ is absolutely gorgeous. Take a look at that flower and inside, the yellow stamens are going to pick up so nicely.”
“And then I have this heuchera, this is a new one, heuchera ‘Huckleberry.’ This one’s quite pewtery on the top side and then the underside, when the wind goes, you’ve got this nicely picking up with the flower of the hellebore.”
These mid-layer plants fill the container visually and create connections between other elements through color, texture, and form.
Understory and Edging Plants
Smaller plants complete the composition by softening edges and filling gaps:
“These are my smaller plants that are going to sit as the understory… And then I’ve got this little Erica fursi. It’s another heather. And I like this little Erica fursi because at the tip of its flower, it’s very, very dark, picking up all the dark tones within the hellebore and the heuchera, and then the rest of it, the paler pink.”
These plants create the finished appearance of a container, disguising soil and container edges while adding detail and complexity to the overall design.
Creating Harmony Through Thoughtful Plant Relationships
Beyond the structural arrangement, consider how plants relate to each other through various design elements:
Texture Contrasts
Combining different leaf and flower textures creates visual interest:
“Really love this leaf, again, very architectural. And because of this spike, it’s going to have a reference to the Mahonia plant.”
Pairing broad, bold foliage with delicate, fine-textured plants creates dynamic tension and visual appeal.
Scale Relationships
Varying the size of elements adds depth and sophistication:
“It’s the size and scale of different flowers and leaves. So you’ve got the largest scale flower here on the hellebore, playing against the smaller flowers on the Mahonia and the heather.”
This interplay of different scales creates visual rhythm and leads the eye through the composition.
Seasonal Progression
Include plants with different flowering times to extend the display:
“Last plant to go in is this Narcissus avalanche. Absolutely smells divine… The stark white blooms will light up the container and balance out the stronger colors.”
Incorporating spring-flowering bulbs with longer-lasting perennials ensures the container remains attractive throughout the season.
Planting Techniques for Success
Proper planting technique ensures both immediate impact and long-term performance:
- Position plants while still in pots to experiment with arrangements before committing
- Be playful with positioning, turning plants to find their most attractive angles
- Tease out roots gently for better soil contact, but avoid excessive root disturbance
- Fill gaps between plants with additional compost, ensuring no air pockets remain
- Water thoroughly after planting, ensuring moisture reaches all root zones
“I’m not teasing out the roots at the moment because I just want to get them in position, play around, make sure that they’re sitting where I want them to be,” Arrit demonstrates. “This one, for example, the leaf is kind of bunching into this. So be playful, turn things around.”
Maintaining Your Spring Container
To ensure your spring container thrives throughout the season:
- Water regularly, especially during dry periods, as containers dry out more quickly than garden soil
- Feed with a balanced liquid fertilizer every 2-3 weeks to support flowering
- Deadhead spent blooms to encourage continued flowering
- Protect from late frosts if tender plants are included
- Monitor for pests and diseases, addressing issues promptly
Celebrating the Season’s Renewal
A thoughtfully designed spring container celebrates the transition from winter to the growing season:
“I’m really happy with this container,” Arrit concludes. “It celebrates spring. There’s color. There’s movement through it. It’s that real lift that’s needed to start the season.”
By combining plants that complement each other in form, texture, and color, you create a microcosm of spring’s promise – a contained explosion of renewal that heralds the garden’s awakening.
Whether placed by an entrance, on a patio, or in a prominent viewpoint from inside your home, spring containers offer immediate gratification after winter’s restraint. They remind us of the cycle of renewal and growth, bringing optimism and color back into our garden spaces just when we need it most.
FAQ Spring Container Planting
Q: When is the best time to plant a spring container garden?
A: The optimal time for planting spring containers is late winter to early spring, just as temperatures begin to moderate. Furthermore, this timing allows plants to establish before warmer weather arrives. Many gardeners start their containers while the main garden still appears dormant, thereby creating immediate visual interest during the transitional season. Additionally, early planting ensures your display reaches peak beauty precisely when your outdoor spaces need color most.
Q: What materials make the best containers for spring plantings?
A: Zinc containers offer excellent benefits due to their lightweight construction and neutral coloration that enhances plant colors. Alternatively, terracotta provides traditional appeal with natural porosity that promotes healthy root development. Concrete containers, meanwhile, offer outstanding durability and thermal mass that moderates soil temperature fluctuations. Above all, ensure your chosen container has proper drainage holes, regardless of material. Subsequently, consider how the container’s style will complement both your plants and surrounding garden aesthetic.
Q: How should I structure plants in my spring container for maximum visual impact?
A: Think of your container as a miniature garden border with three distinct layers. First, position taller plants like Mahonia or ornamental grasses toward the back as anchors. Next, add mid-layer plants such as hellebores or heucheras to provide substance and transition. Finally, incorporate smaller edging plants that soften borders and fill gaps. Consequently, this three-tiered approach creates depth and visual interest from all angles. Moreover, consider how plant textures contrast and complement each other for additional dimensional appeal.
Q: What are the best plants to include in a spring container display?
A: Early-flowering spring plants like Mahonia provide fragrant yellow blooms and architectural interest. Additionally, tree heathers such as Erica Australis offer delicate flowers with contrasting textures. For the mid-layer, hellebores like ‘Annas Red’ deliver stunning large blooms, while heucheras contribute distinctive foliage color. Furthermore, underplant with smaller heathers, primulas, or violas for edge definition. Lastly, incorporate spring bulbs such as Narcissus avalanche to extend seasonal interest and add vertical elements with their white blooms and divine fragrance.
Q: How do I properly prepare soil for a spring container garden?
A: Begin with high-quality, peat-free compost specifically formulated for containers, which provides excellent nutrition and drainage. First, add a 1-2 inch layer of broken pottery pieces (crocks) at the container bottom to facilitate drainage. Then, fill the container approximately halfway with compost before positioning plants. Subsequently, this approach allows you to adjust plant depths easily while arranging. After positioning plants perfectly, fill remaining spaces with additional compost, meanwhile ensuring no air pockets remain. Finally, water thoroughly to settle soil and provide initial moisture for your newly planted display.
Q: How should I consider color when designing my spring container?
A: Spring containers benefit from thoughtful color relationships that enhance visual appeal. Initially, consider complementary colors—those opposite on the color wheel—to create vibrant contrasts that energize the display. Alternatively, analogous color schemes use neighboring hues for harmonious, sophisticated combinations. Furthermore, monochromatic arrangements featuring variations of a single color offer elegant simplicity. Most importantly, spring’s soft, nuanced colors respond beautifully to the season’s gentle light. Therefore, consider how plant colors will interact with both container material and surrounding garden elements for a cohesive overall appearance.
Q: What maintenance is required for spring container gardens?
A: Regular watering forms the foundation of container maintenance, especially since pots dry more quickly than garden soil. In addition, apply balanced liquid fertilizer every 2-3 weeks to support vigorous flowering throughout the season. Moreover, promptly remove spent blooms to encourage continued flowering and maintain visual appeal. Meanwhile, monitor for pests and diseases, addressing any issues immediately to prevent spread. During unexpected late frosts, protect tender plants with horticultural fleece or temporarily relocate containers to sheltered locations. Consequently, this consistent care regimen ensures your spring display remains vibrant for months.
Q: How can I extend the seasonal interest of my spring container garden?
A: Incorporate plants with sequential flowering periods to ensure continuous interest throughout spring. For instance, combine early bloomers like hellebores with mid-season flowers such as narcissus and later-blooming perennials. Additionally, select plants with attractive foliage that provides texture and color even when not flowering. Furthermore, include plants with different growth habits to maintain visual interest as the season progresses. Once spring blooms fade, consider refreshing containers with summer-flowering annuals while preserving perennial elements. Thus, through thoughtful planning, your container can evolve seamlessly through multiple seasons.